※本產品原廠代理從國外進口,有些交期較長,下訂前請詢問!

SparkFun ESP32 Thing DEV-13907
Description: The SparkFun ESP32 Thing is a comprehensive development platform for Espressif’s ESP32, their super-charged version of the popular ESP8266. Like the 8266, the ESP32 is a WiFi-compatible microcontroller, but to that it adds support for Bluetooth low-energy (i.e BLE, BT4.0, Bluetooth Smart), and nearly 30 I/O pins. The ESP32’s power and versatility will make it the foundation of IoT and connected projects for many years to come.
Why the name? We lovingly call it the “Thing” because it’s the perfect foundation for your Internet of Things project. The Thing does everything from turning on an LED to posting data with phant.io, and can be programmed just like any microcontroller. You can even program the Thing through the Arduino IDE by installing the ESP32 Arduino Core.
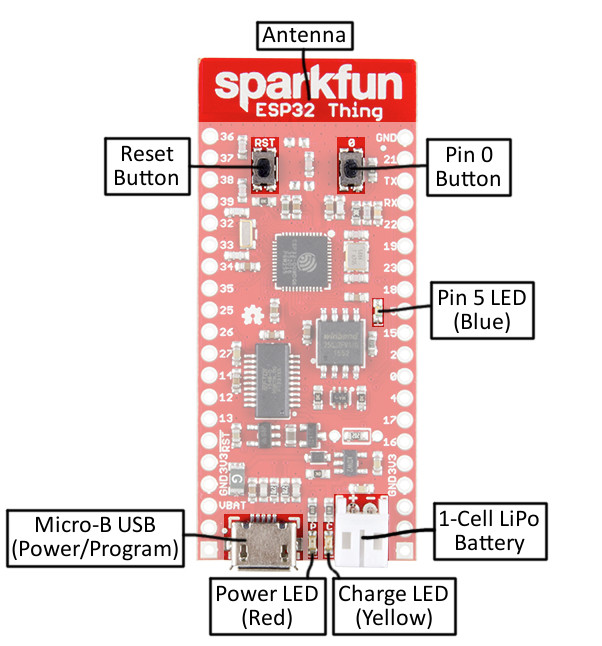
The SparkFun ESP32 Thing equips the ESP32 with everything necessary to program, run and develop on the wonderchip. In addition to the WiFi/BLE SoC, the Thing includes an FTDI FT231x, which converts USB to serial, and allows your computer to program and communicate with the microcontroller. It also features a LiPo charger, so your ESP32 project can be battery-powered and truly wireless. Additionally, the board includes a handful of LEDs and buttons to aid in your development.
Features:
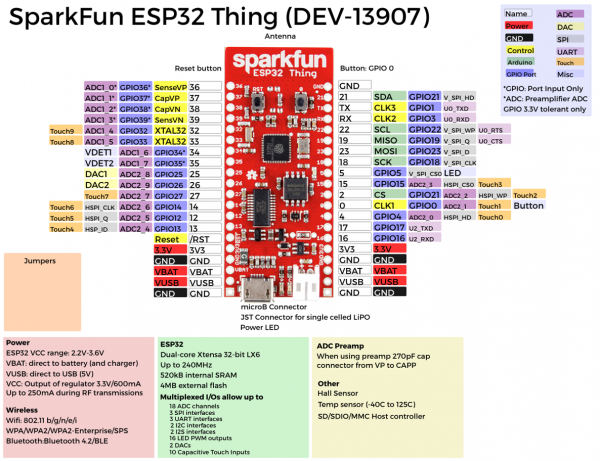
- Dual-core Tensilica LX6 microprocessor
- Up to 240MHz clock frequency
- 520kB internal SRAM
- Integrated 802.11 BGN WiFi transceiver
- Integrated dual-mode Bluetooth (classic and BLE)
- 2.2 to 3.6V operating range
- 2.5 µA deep sleep current
- 28 GPIO
- 10-electrode capacitive touch support
- Hardware accelerated encryption (AES, SHA2, ECC, RSA-4096)
- 4MB Flash memory
- Integrated LiPo Battery Charger
https://learn.sparkfun.com/tutorials/esp32-thing-hookup-guide#arduino-example-blink
Documents:

| 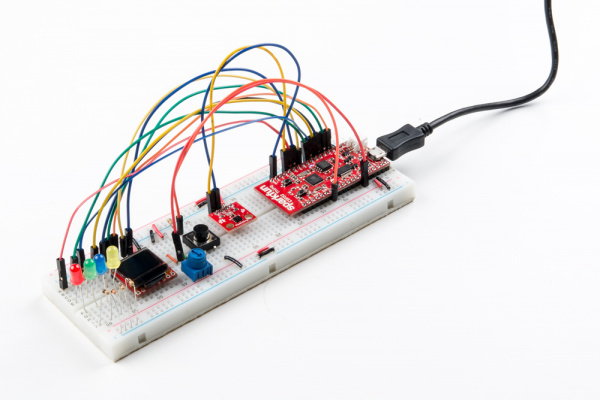
All those wires and components, and there are still plenty of GPIO left to use! Alternatively, female headers (you may need two separate strips to solder all 40 pins), right-angle headers, or stranded wire are all good options, depending on your project’s needs.
|
| Arduino Example: Blink With the ESP32 Arduino core installed, you’re ready to begin programming. If you haven’t already, plug the ESP32 Thing into your computer using a micro-B USB cable. 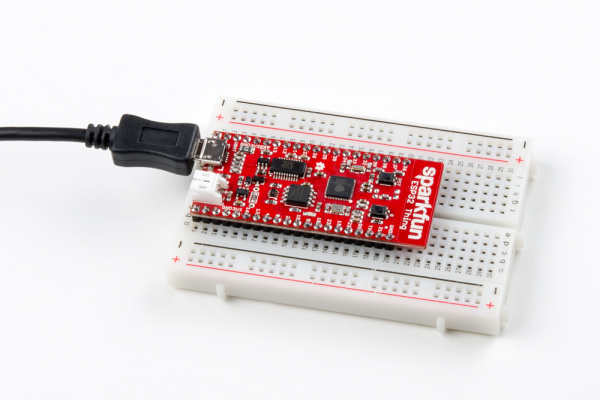
FTDI Drivers If you've never connected an FTDI device to your computer before, you may need to install drivers for the USB-to-serial converter. Check out our How to Install FTDI Drivers tutorial for help with the installation. |
| Once the board is plugged in (and drivers installed), it should be assigned a unique port identifier. On Windows machines, this will be something like “COM#”, and on Macs or Linux computers it will come in the form of “/dev/tty.usbserial-XXXXXX.” Select the Board and Port Once the ESP32 Arduino core is installed, you should see an “ESP32 Dev Module” option under your “Tools” > “Board” menu. Select that. 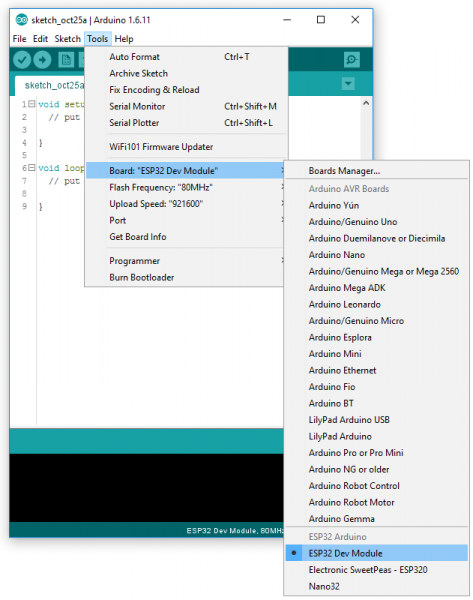
Then select your ESP32 Thing’s serial port under the “Tools” > “Port” menu. 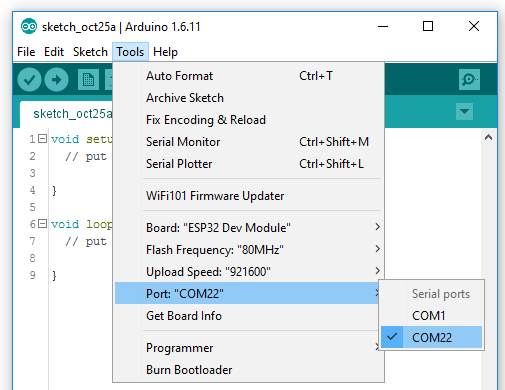
You can also select the “Upload Speed”. 921600 baud – the fastest selectable rate – will get the code loaded onto your ESP32 the fastest, but may fail to upload once-in-a-while. (It’s still way worth it for the speed increase!)
|


