產品說明0
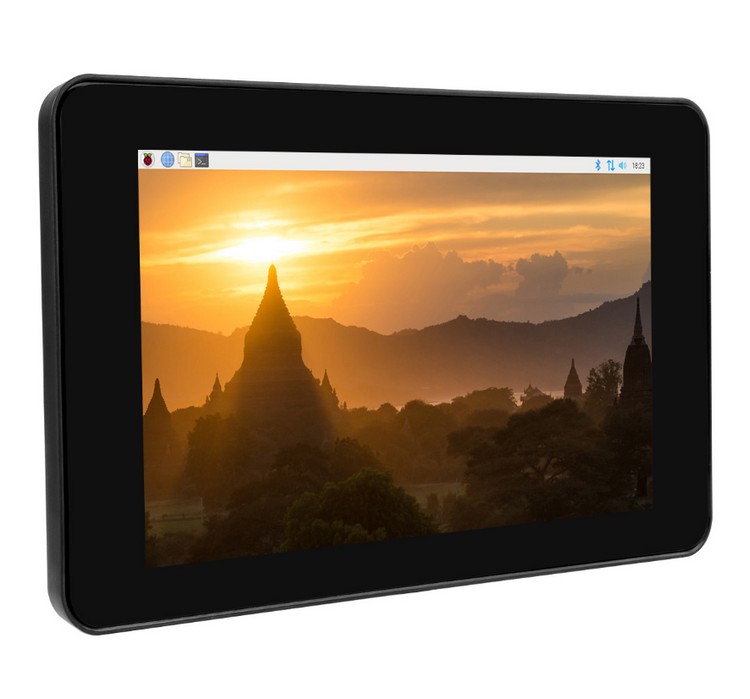
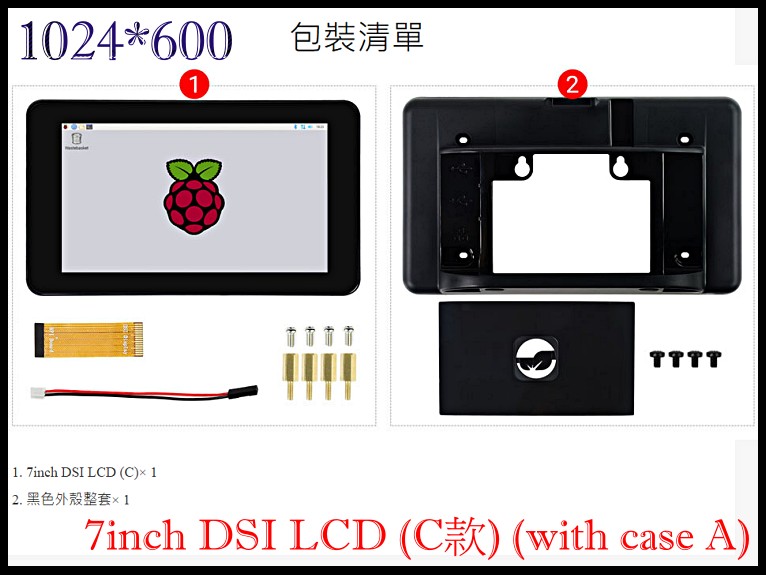
7inch DSI LCD (C款) (with case A),Raspberry Pi 樹莓派 7寸 電容觸控屏 C款-帶Pi4一體殼 1024×600 IPS
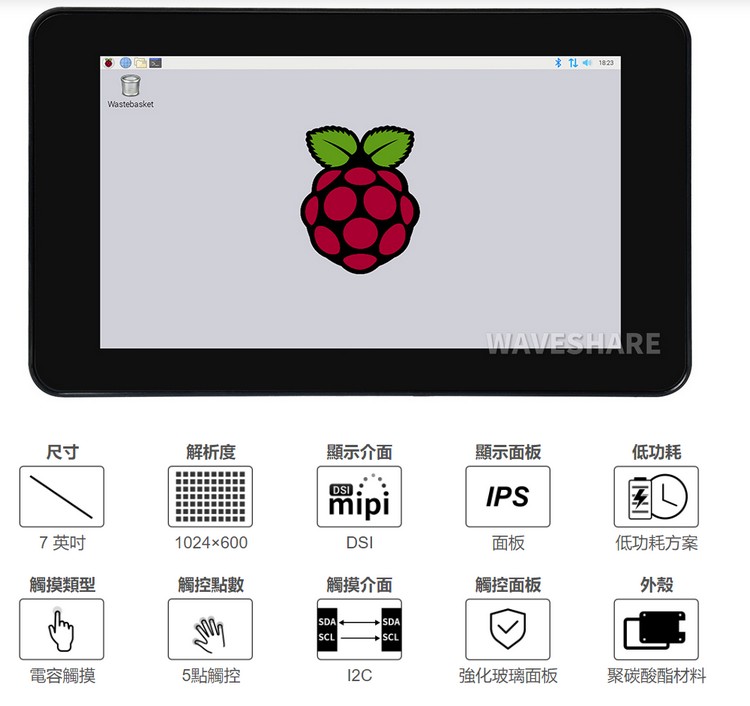
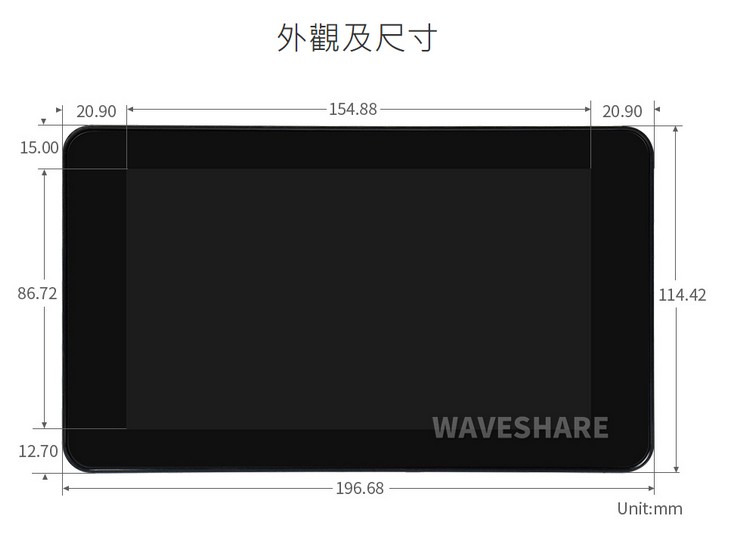
7吋IPS電容觸控螢幕附外殼1024×600像素DSI通訊
5點觸控,I2C觸控接口,強化玻璃面板,聚碳酸酯材料

資料路徑:www.waveshare.net/wiki/7inch_DSI_LCD_(C)_
【產品特性】
- 7吋IPS電容觸控屏,硬體解析度為1024×600
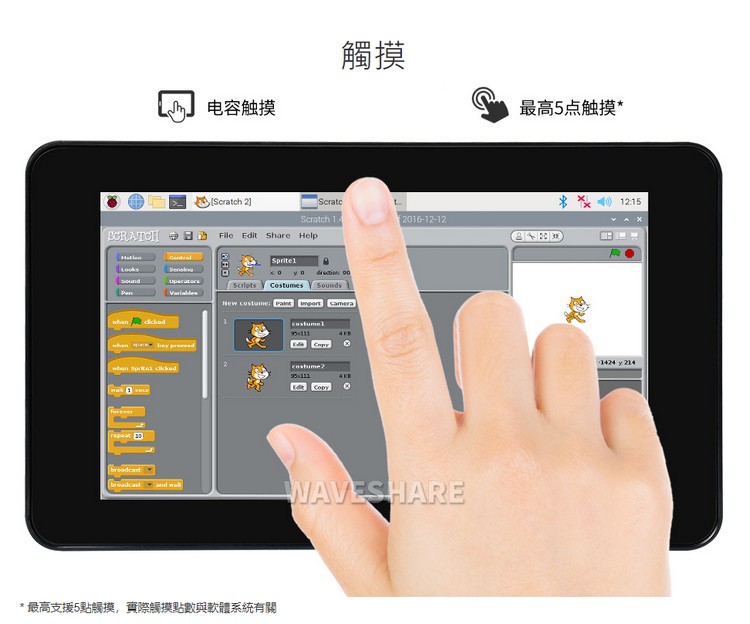
- 電容式5點觸控控制
- 強化玻璃電容觸摸面板,硬度達6H
- 直接透過Raspberry Pi的DSI介面驅動LCD,刷新率可達60Hz
- 配合Raspberry Pi使用時,提供Raspberry Pi OS系統驅動
- 支援Pi 4B
- 支援軟體調節背光


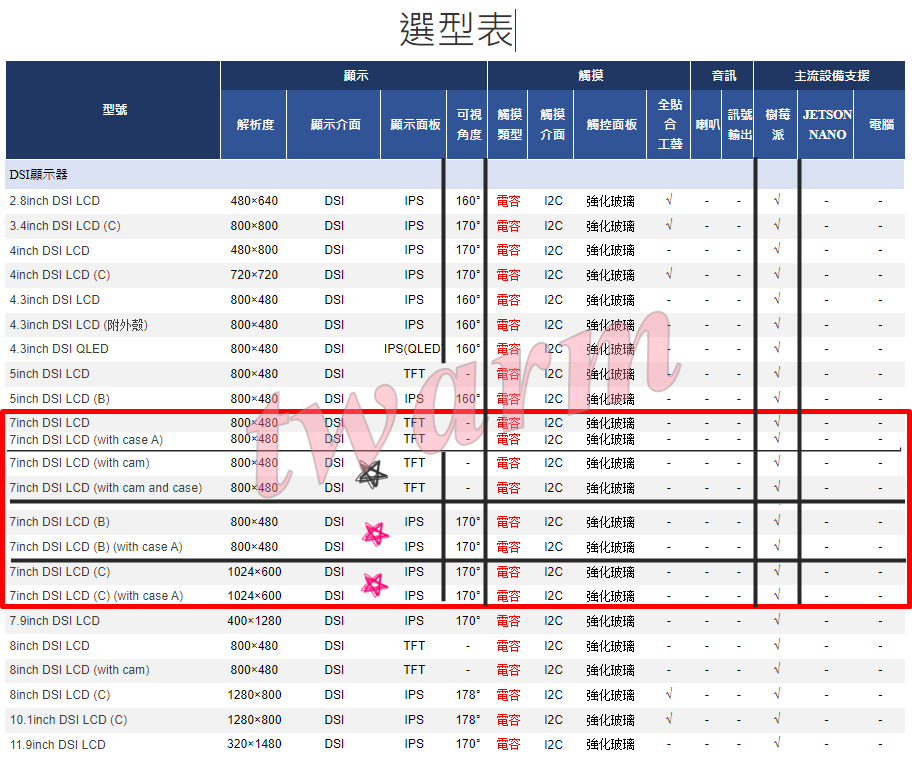
【選型表】
相關文件
資料路徑:www.waveshare.net/wiki/7inch_DSI_LCD_(C)_
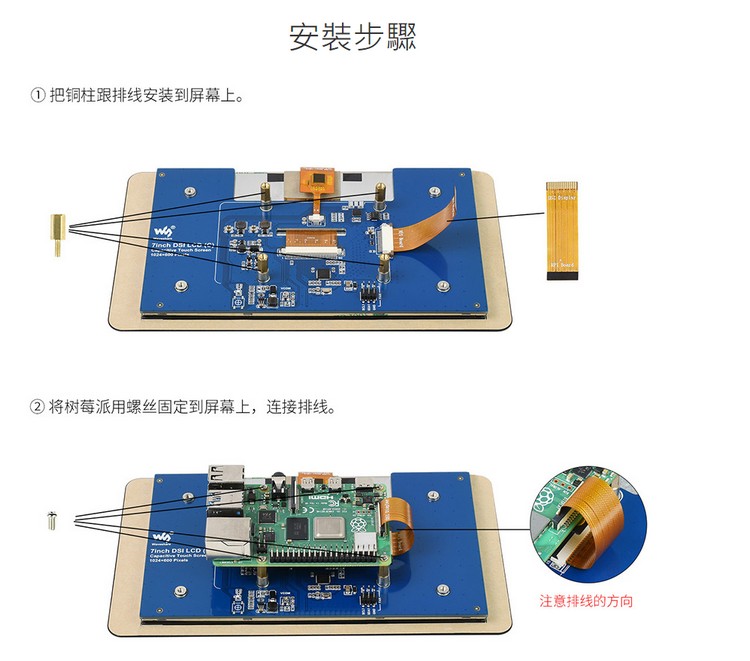
搭配樹莓派主機板使用
硬體連接
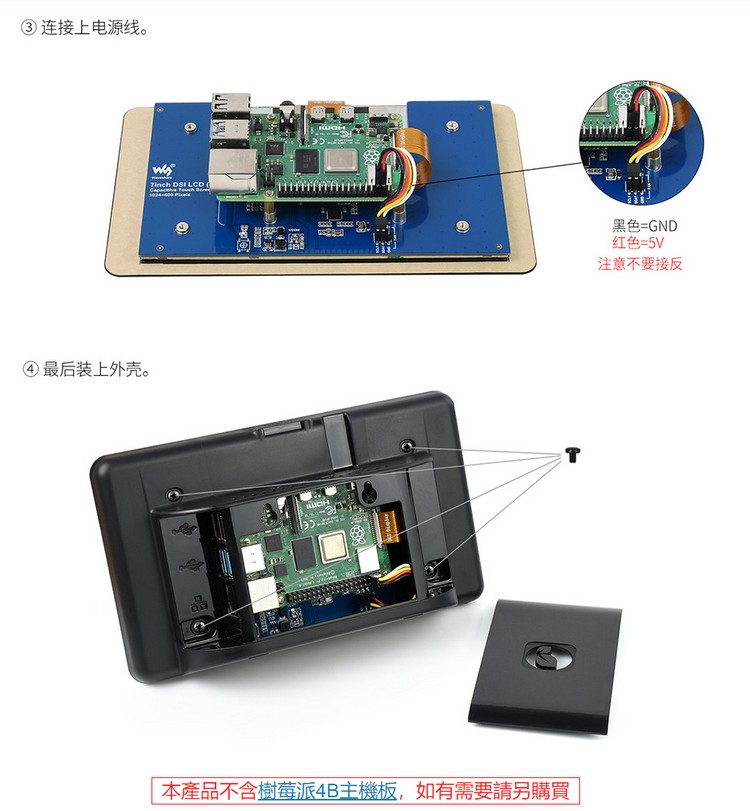
1. 使用15PIN的FPC排線,將顯示器DSI介面連接到樹莓派主機板的DSI介面。 2. 將搭配銅柱固定的7inch DSI LCD (C)底板背面,將Raspberry Pi透過螺絲固定在銅柱上。 3. 將4PIN杜邦線按下圖連接: 最終連接如下圖所示: 
注意事項
1. 更新系統,如執行以下命令
sudo apt-get update
sudo apt-get full-upgrade
更新完系統後,原本安裝的驅動程式有些檔案可能會被覆掉,需要重新安裝驅動程式才可以正常顯示。
2. 更換主機板
如果原來在Raspberry Pi 4 Model B上安裝的驅動,用戶更換主機板,例如修改成Raspberry Pi 3 Model B+,會導致顯示器無法正常顯示。
因為Pi4和Pi3需要載入不同的驅動文件,需在新的主機板上依照#軟體設定重新安裝驅動程式才可以正常顯示。
FAQ
使用5V供電,開式背光工作電流約500mA,關背光工作電流約100mA。
- 2.將/boot/config.txt檔案結尾中的
I2C_bus= 1修改為I2C_bus= 10 進行完以上修改後,原本的I2C1接線(RPi的GPIO3和GPIO5)需斷開連接


